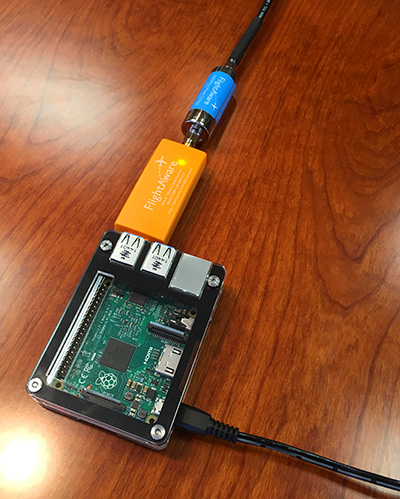
Once your device is running, please:
Option 1
Find and claim the FlightFeeder device through Bluetooth using the FlightAware iOS App or using the FlightAware Configure Page
(Keep in mind, the Bluetooth method will only work for devices with PiAware image flashed on to the SD card, not manually installed.)
Option 2
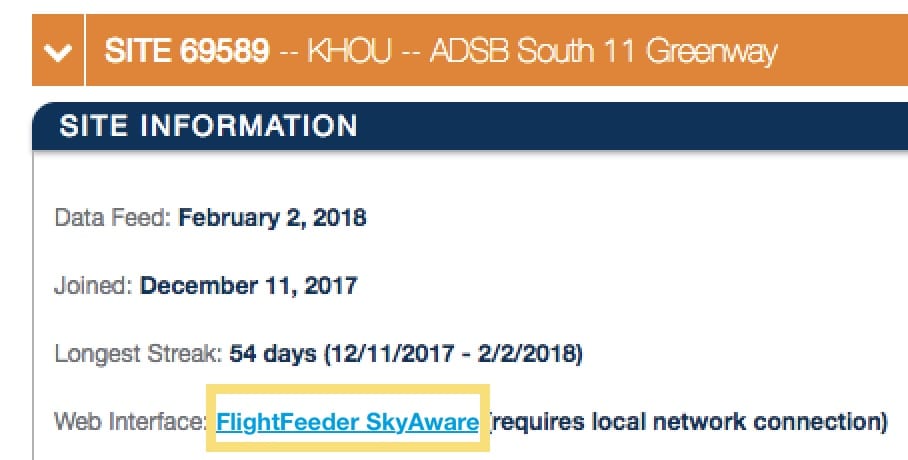
Manually claim your FlightFeeder device online through your FlightFeeder's IP address.
If using an LCD Screen or if able plug in the Raspberry Pi device into a monitor through an HDMI Cable, the FlightFeeder IP address can be found through the PiAware UI display.
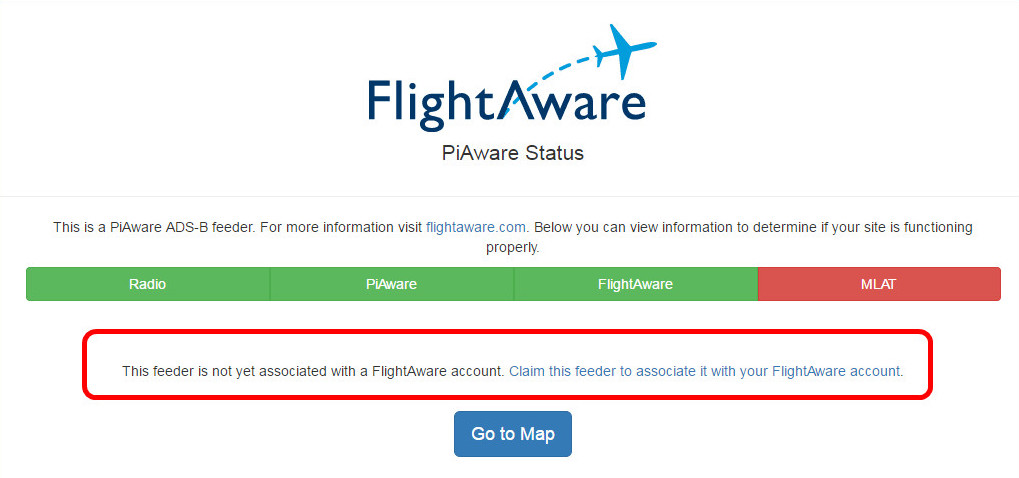
While on your computer, look up the local IP address assigned to your PiAware device through your router/firewall and search for the assigned IP address in a browser on the same network. If the device hasn't been claimed a link to claim the PiAware device will display.
Option 3
If you have command line access you can get the FlightFeeder's unique ID using the command: With the unique ID for the feeder you can enter it into the end of the URL below in place of the x's:
cat /var/cache/piaware/feeder_id
With the unique ID for the feeder you can enter it into the end of the URL below in place of the x's:
https://www.flightaware.com/adsb/piaware/claim/xxxxxxxx-xxxx-xxxx-xxxx-xxxxxxxx
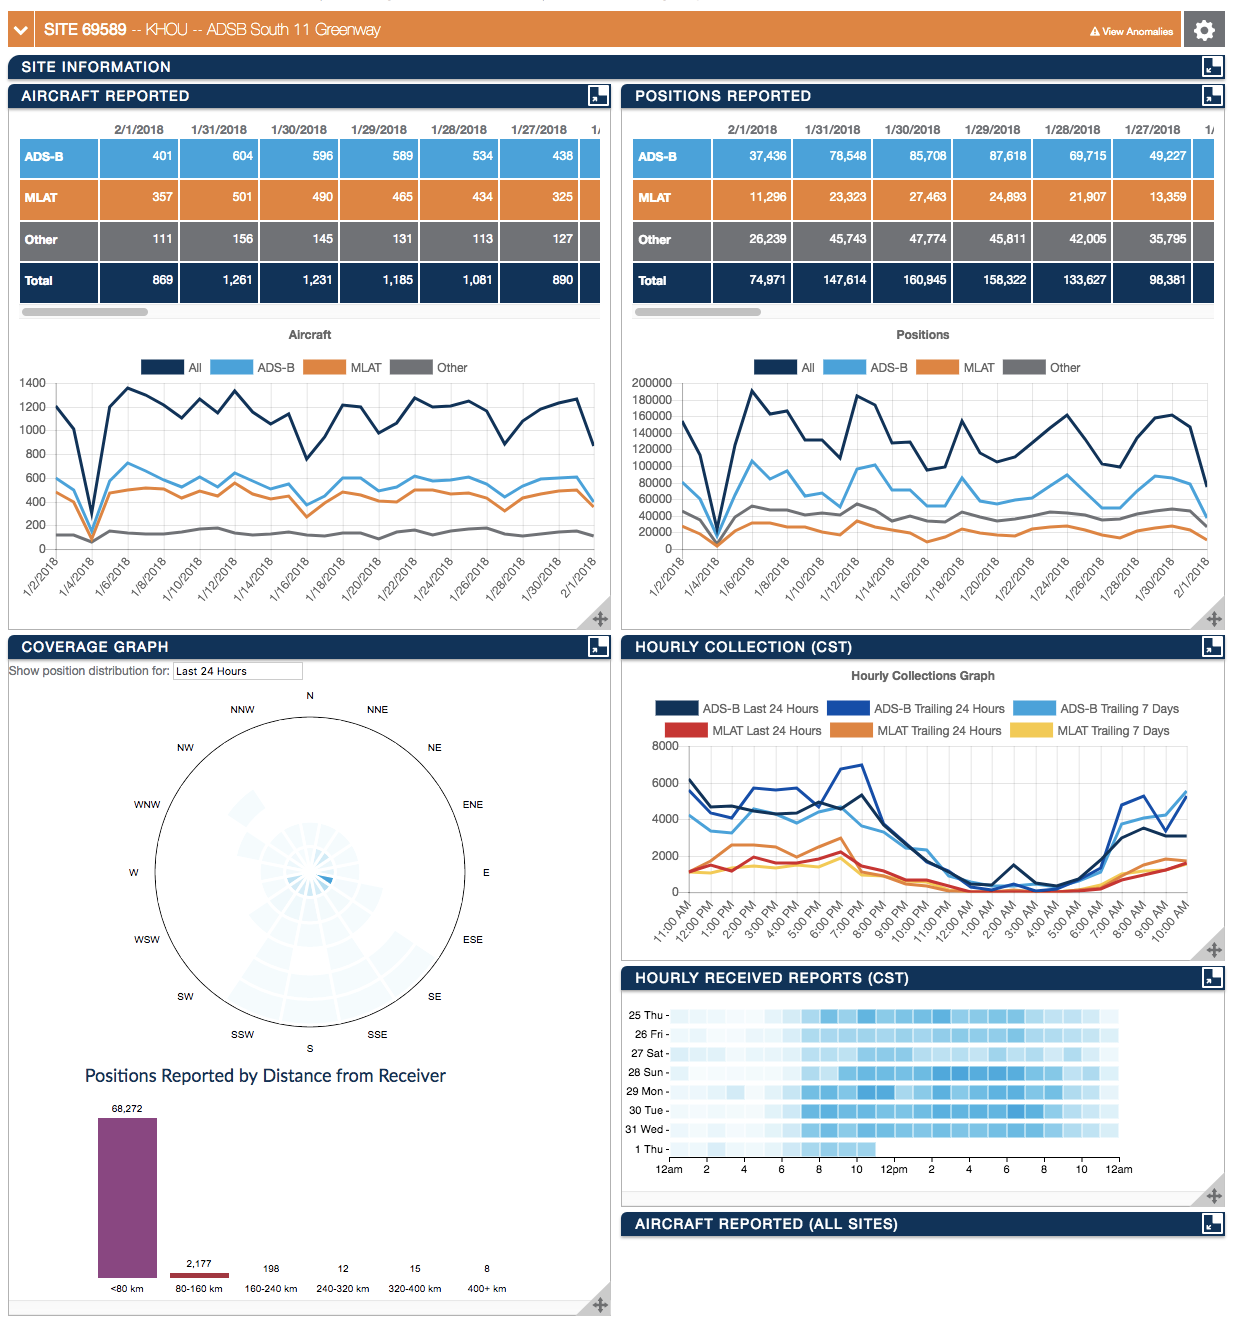
If after 5 minutes your device hasn't displayed as claimed try restarting the device, if that still doesn't work re-confirm the Wi-Fi settings (if using Wi-Fi) are correct. Lastly contact us at ADSBsupport@FlightAware.com. Check your stats page (link below) to confirm it was claimed.